Verify Smart Contract On Explorer Guide
Jovay Explorer now supports smart contract verification. You can verify your smart contracts by providing the source code files or by using the Solidity Standard JSON Input file. This guide will walk you through both methods.
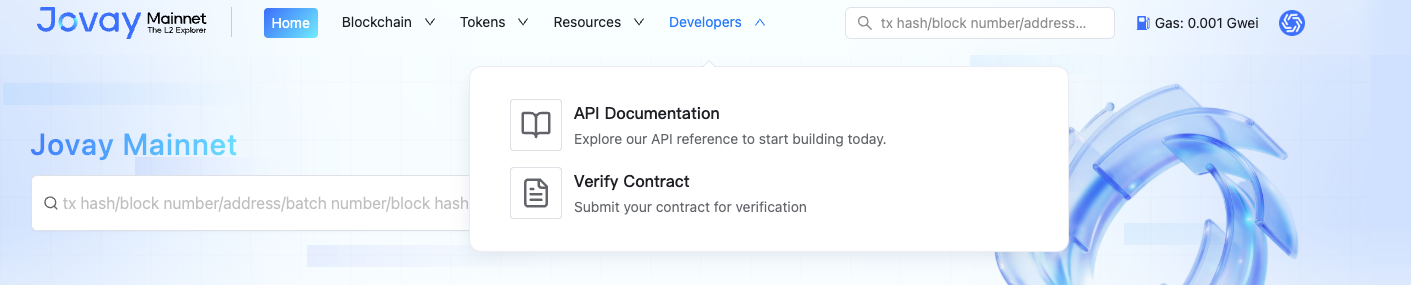
You can find the contract verification feature in the block explorer's navigation:
Method 1: Using Raw Contract Source Files
This method is suitable for simple contracts that do not use external libraries like OpenZeppelin.
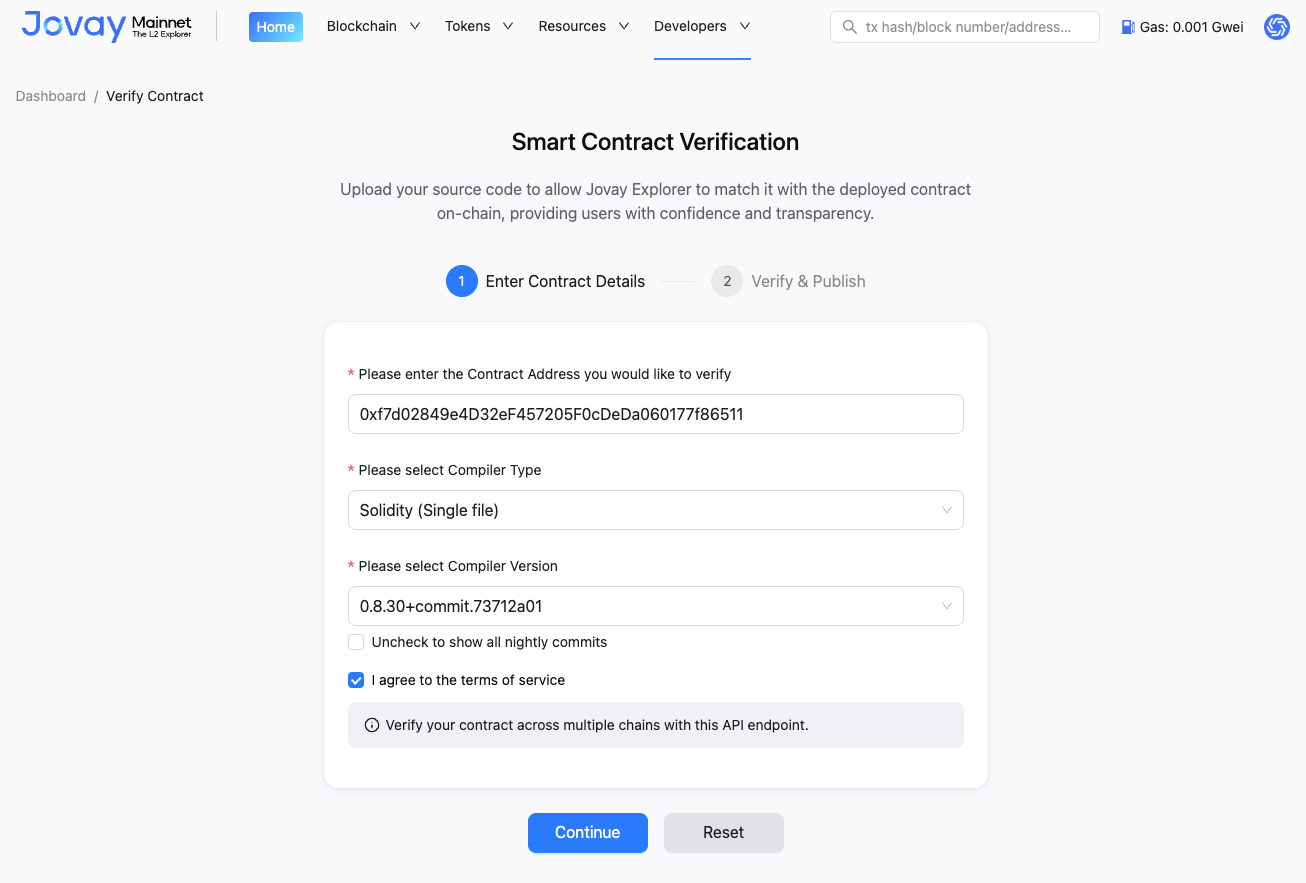
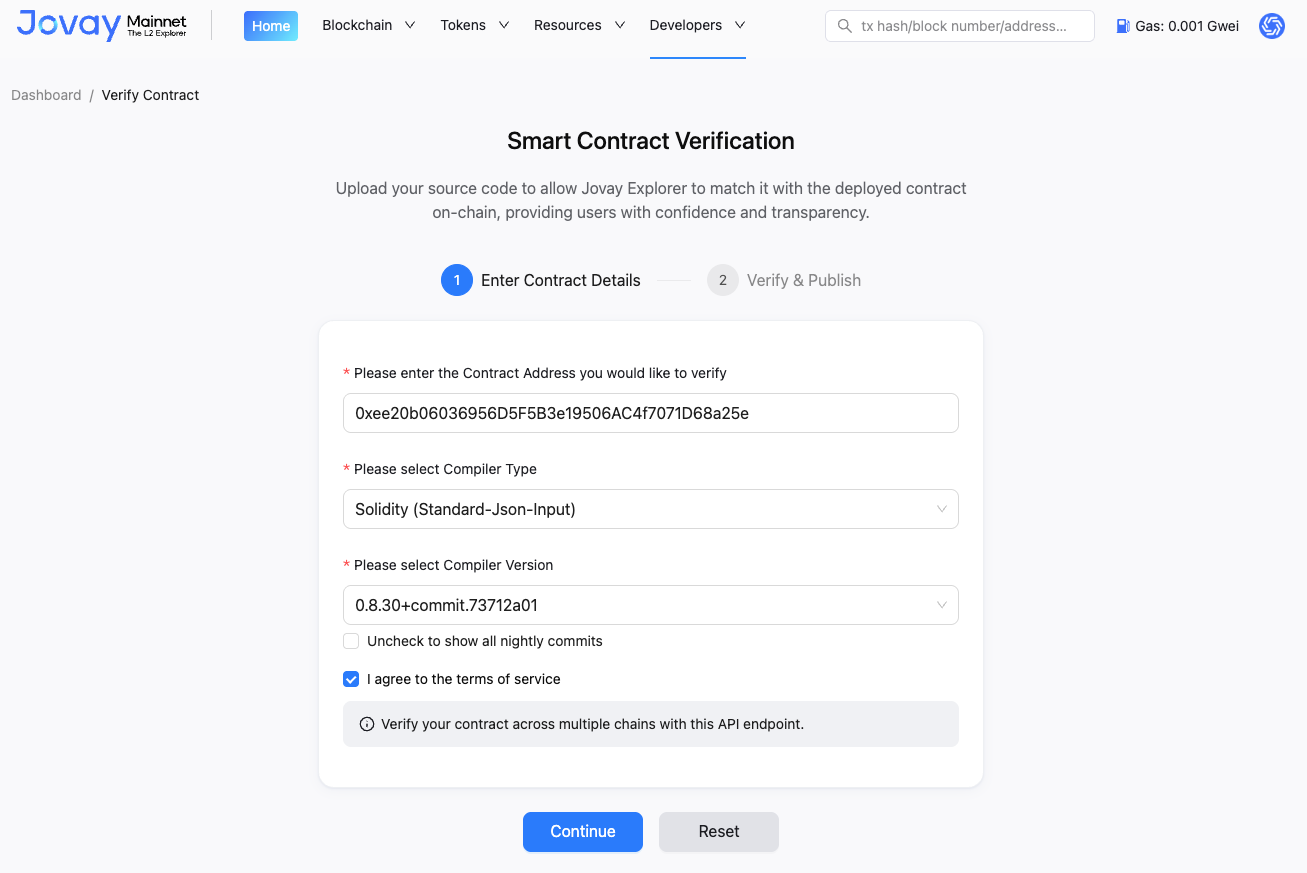
Step 1: Initial Setup
- Navigate to the contract verification page on Jovay Scan.
- Enter the address of the smart contract you want to verify.
- For the "Compiler Input Type," select "Solidity Source File."
- Choose the correct "Solidity Compiler Version" from the dropdown menu.
- Check the box next to "I agree to the terms of service."
- Click "Continue."
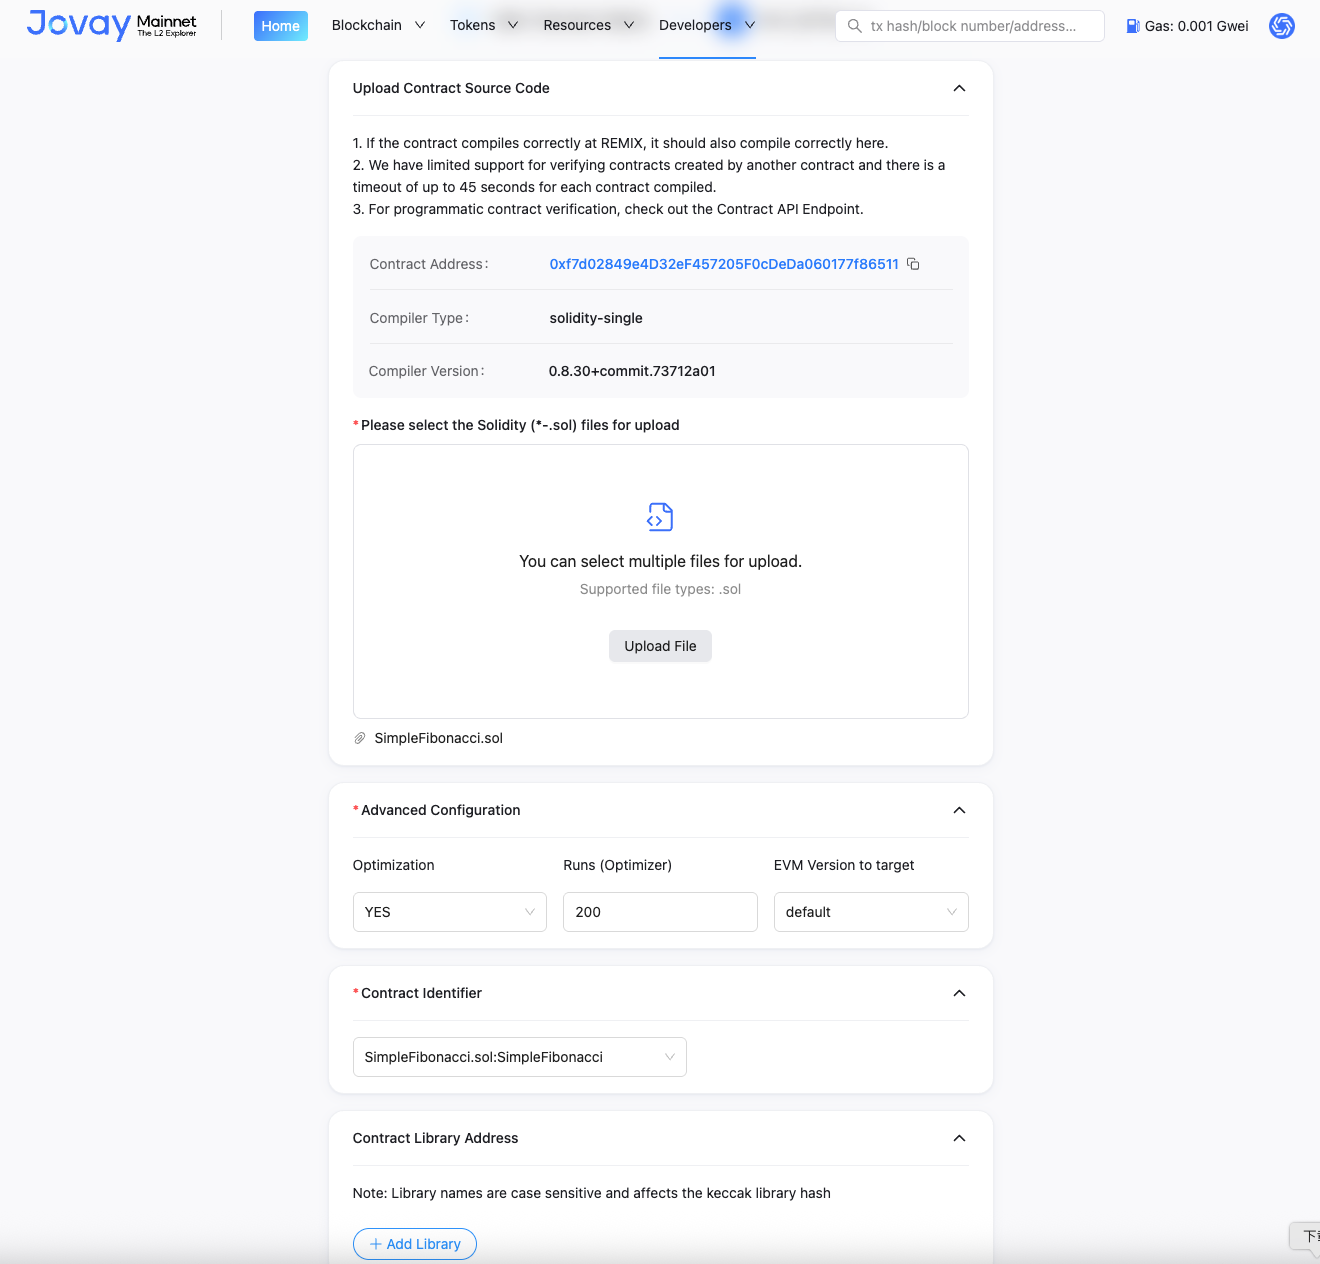
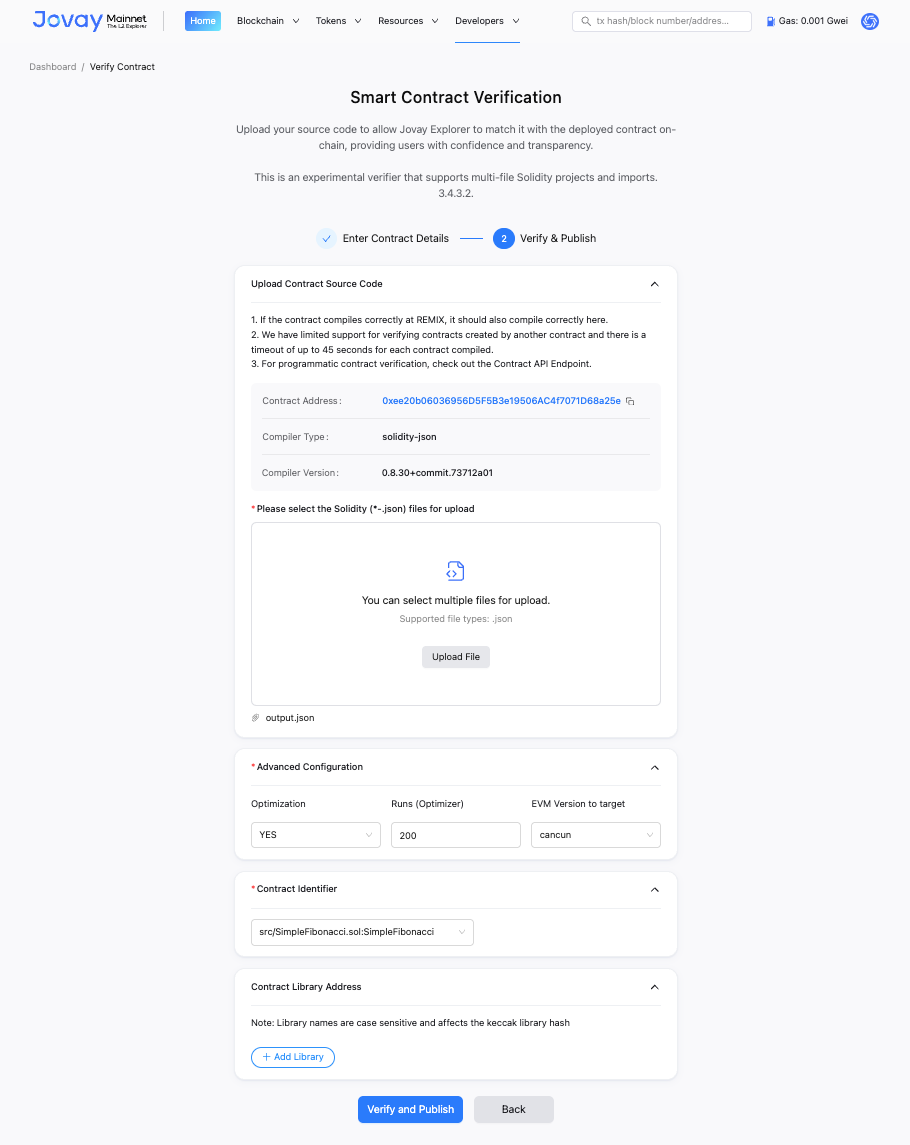
Step 2: Uploading Source Files and Configuration
- Upload all the Solidity source files for your contract.
- Specify whether you enabled optimization during compilation.
- If optimization was enabled, enter the number of optimization runs.
- Select the target EVM version.
- From the "Contract Identifier" dropdown, choose the contract file that was used for deployment.
- If your contract uses any library contracts, add them in the "Library Contracts" section.
- Click "Verify."
Step 3: Verification Complete
If the verification is successful, you will see a success message with a link to the verified contract on Jovay Scan.

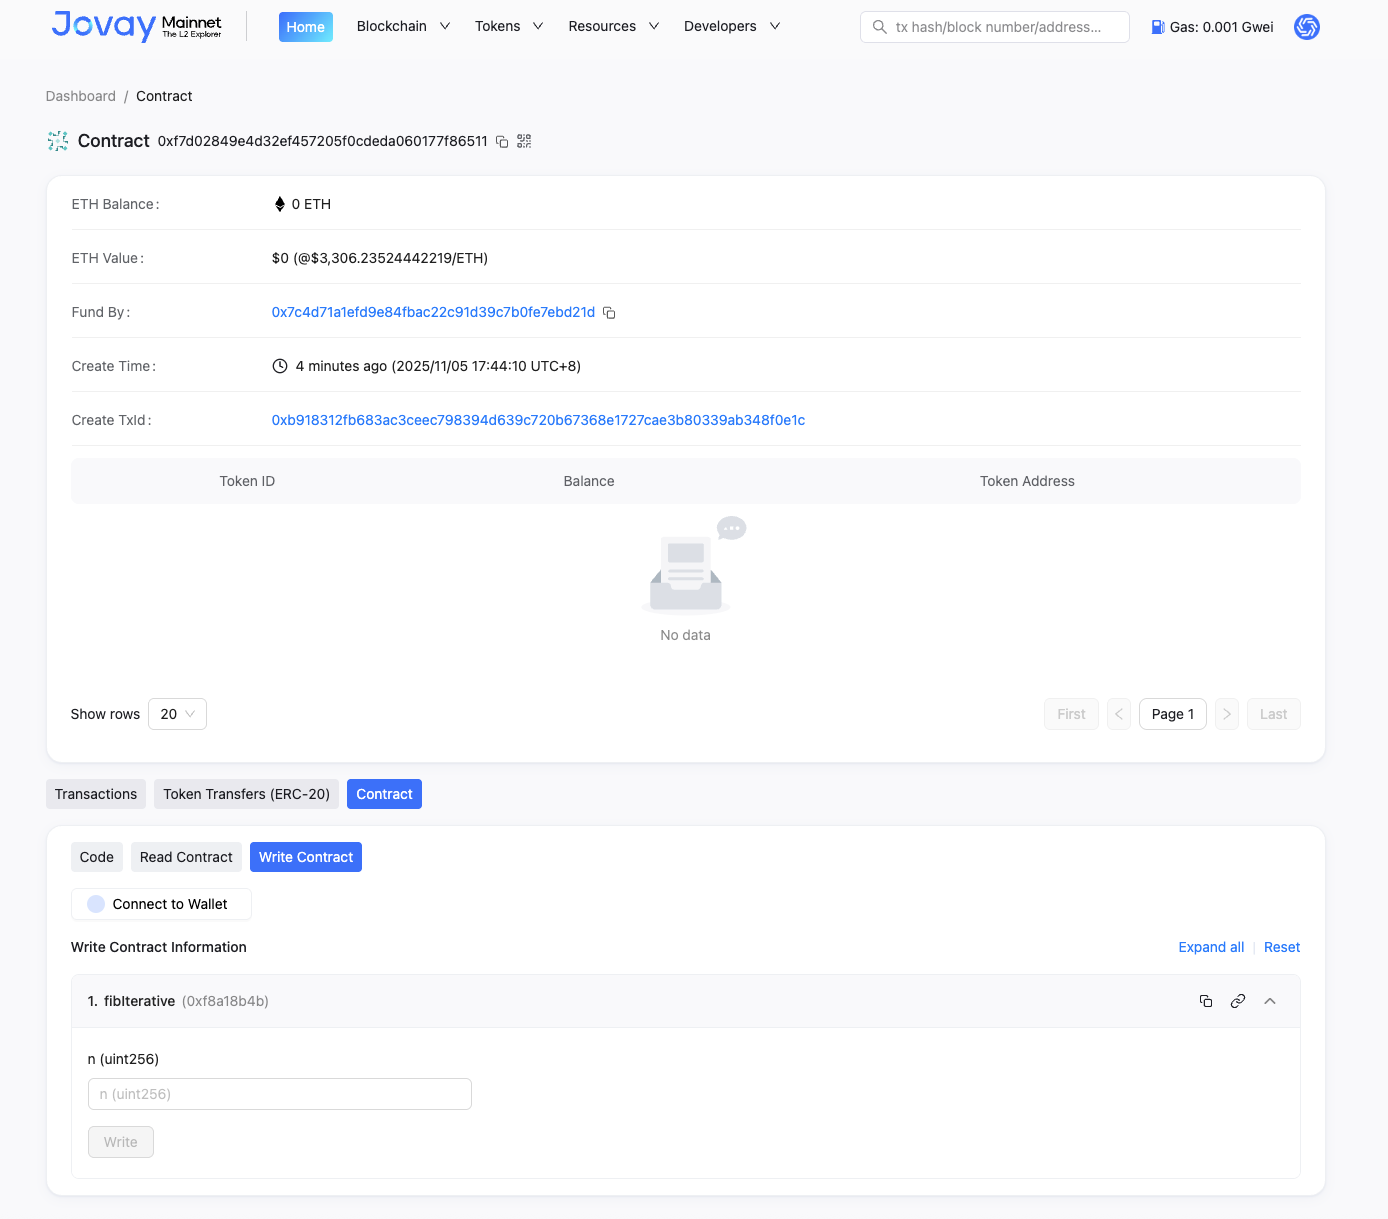
Step 4: View Verified Contract
After successful verification, you can view the contract's source code, read and write functions, and other details on Jovay Scan.
Method 2: Using Solidity Standard Input JSON File
This method is recommended for more complex contracts, especially those that use external libraries.
Step 1: Initial Setup
- Follow the same initial setup steps as in Method 1, but for the "Compiler Input Type," select "Solidity Standard Json Input."
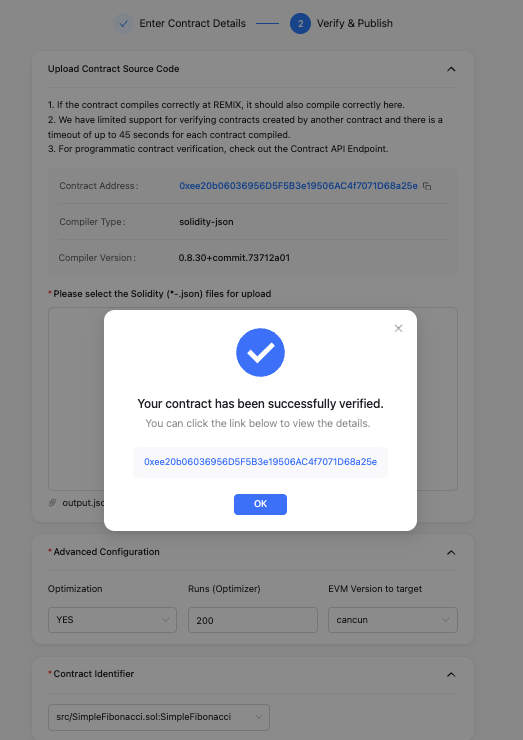
Step 2: Generating and Uploading the JSON File
For projects using Foundry, you can generate the Standard Input JSON file by running the following command:
bashforge verify-contract --show-standard-json-input <CONTRACT_ADDRESS> <CONTRACT_IDENTIFIER> > output.jsonUpload the generated JSON file, eg.
output.json.The remaining steps are similar to Method 1. You will need to configure the optimization settings, EVM version, and any library contracts.
Click "Verify."
Step 3: Verification Complete
Upon successful verification, you will receive a confirmation message with a link to your verified contract.