Jovay Bridge DApp Guide
This guide will walk you through the process of using the Jovay Bridge to transfer assets, specifically ETH, between the Ethereum network and the Jovay network.
Below are the details for the mainnet and testnet versions of the bridge:
| Version | DApp URL | Network |
|---|---|---|
| Jovay Bridge(Mainnet) | https://bridge.jovay.io/ | Layer1: Ethereum Mainnet Layer2: Jovay Mainnet |
| Jovay Bridge(Testnet) | https://bridge-test.jovay.io/ | Layer1: ETH Sepolia Testnet Layer2: Jovay Sepolia Testnet |
Prerequisites
Before you begin, please ensure you have the following:
- A web3 wallet, such as MetaMask or OKX Wallet.
- ETH in your wallet on the source network (Ethereum or Sepolia) to pay for gas fees and the deposit amount.
1. Connecting Your Wallet
First, navigate to the Jovay Bridge DApp homepage.
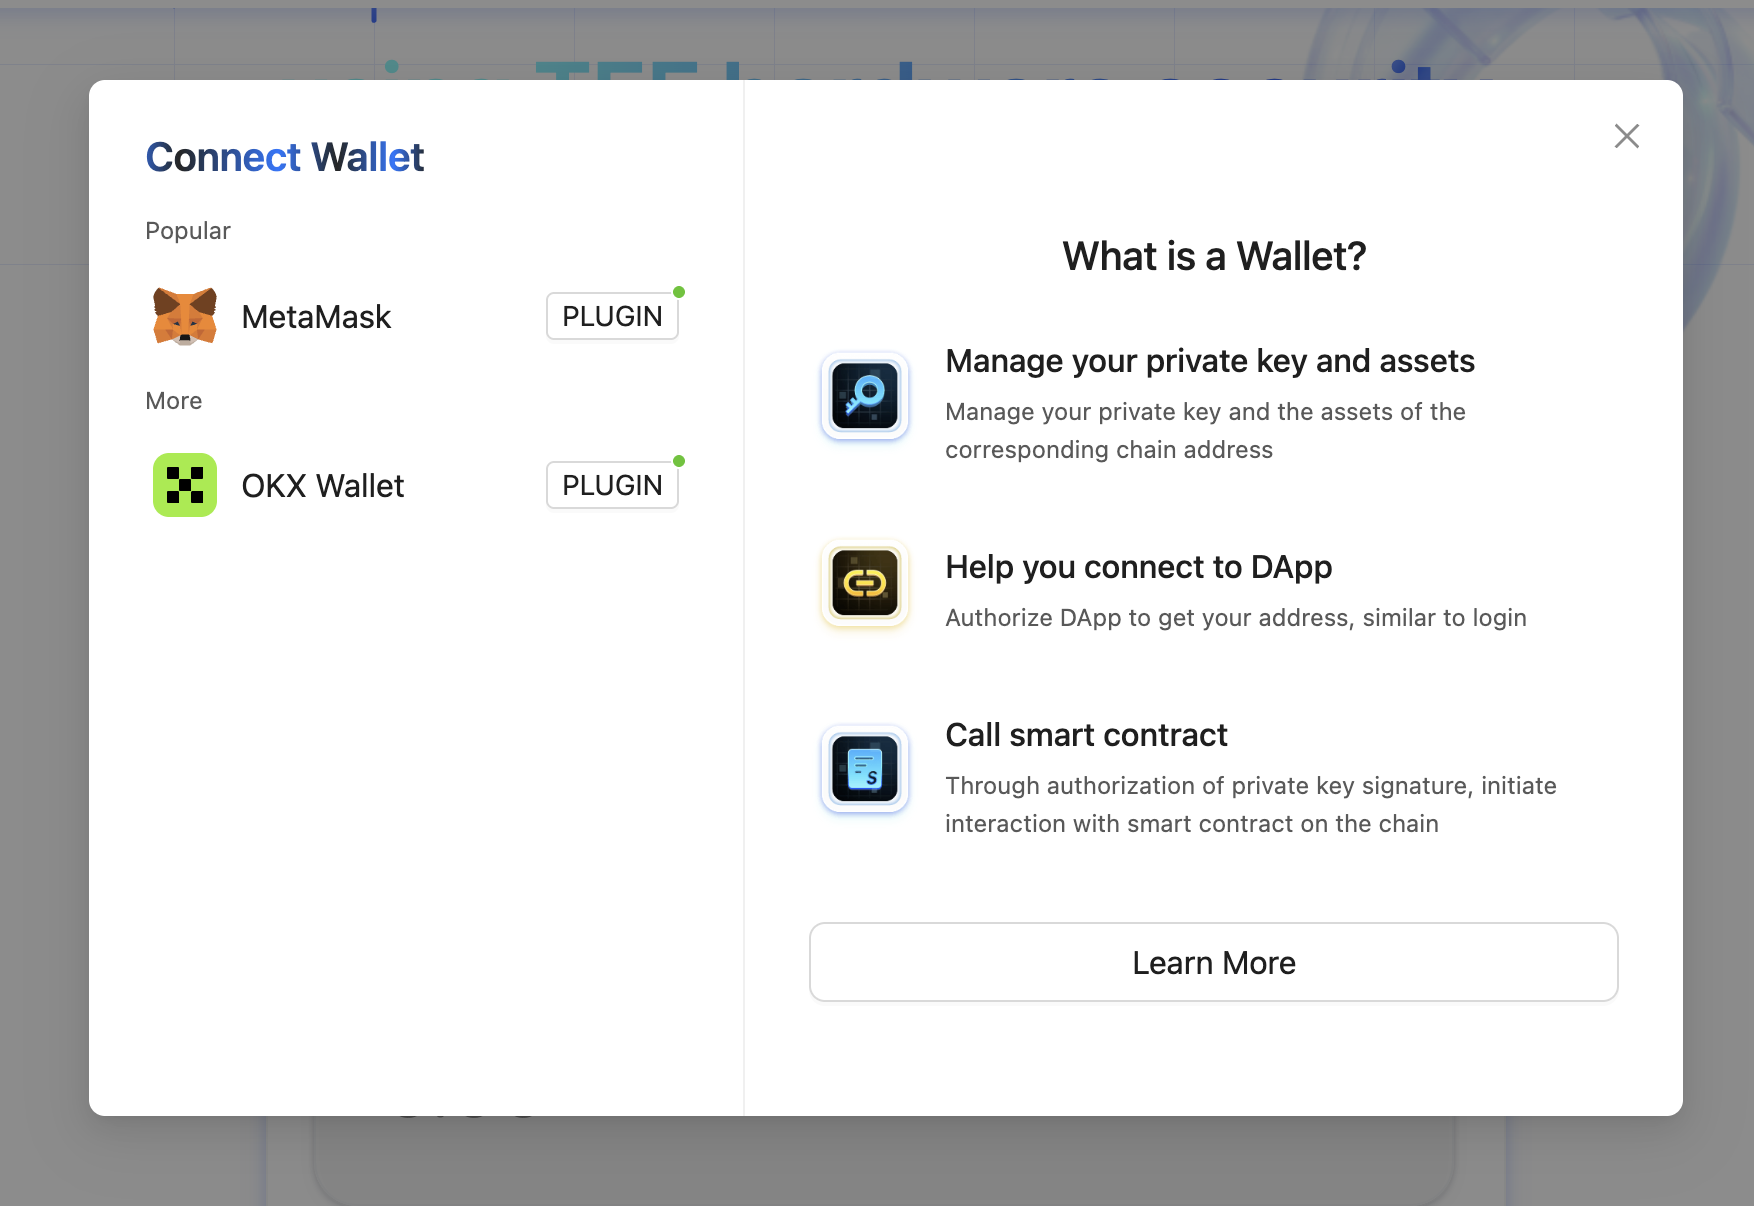
Initiate Connection: Click the "Connect Wallet" button.
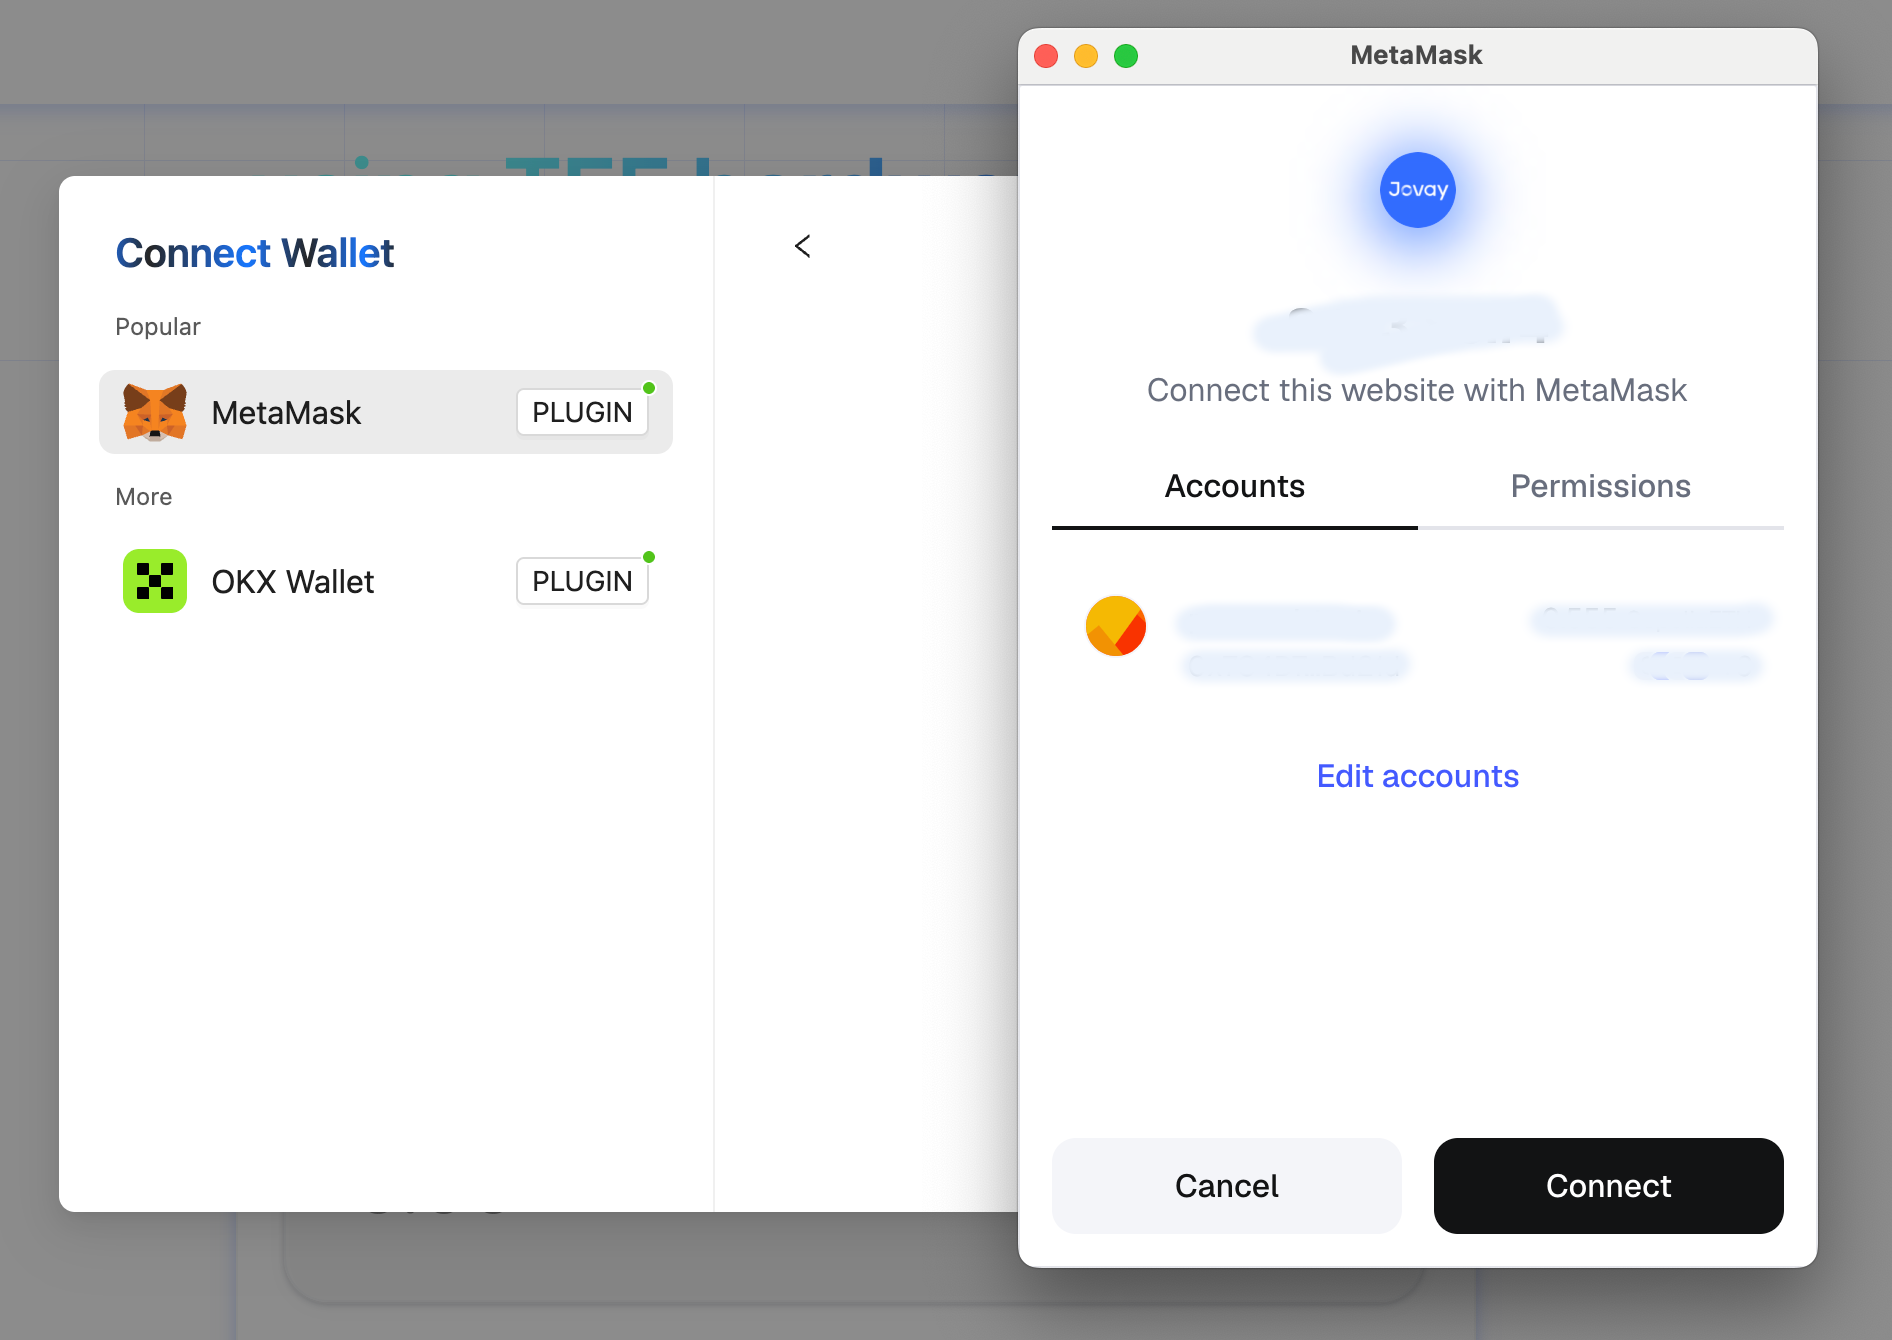
Choose Your Wallet: A pop-up will appear. Select either MetaMask or OKX Wallet.
Approve and Configure: Follow the prompts in your wallet extension to approve the connection. The DApp will also prompt you to add or switch to the correct network (e.g., Jovay Mainnet or Jovay Testnet) if you are not already connected to it. You can also use the network switcher in the top-right corner to change networks manually.

2. How to Deposit (from Ethereum to Jovay)
The deposit process transfers ETH from the Ethereum network (L1) to the Jovay network (L2).
Select Deposit: Navigate to the "Deposit" tab.
Enter Amount: Input the amount of ETH you wish to transfer to Jovay.
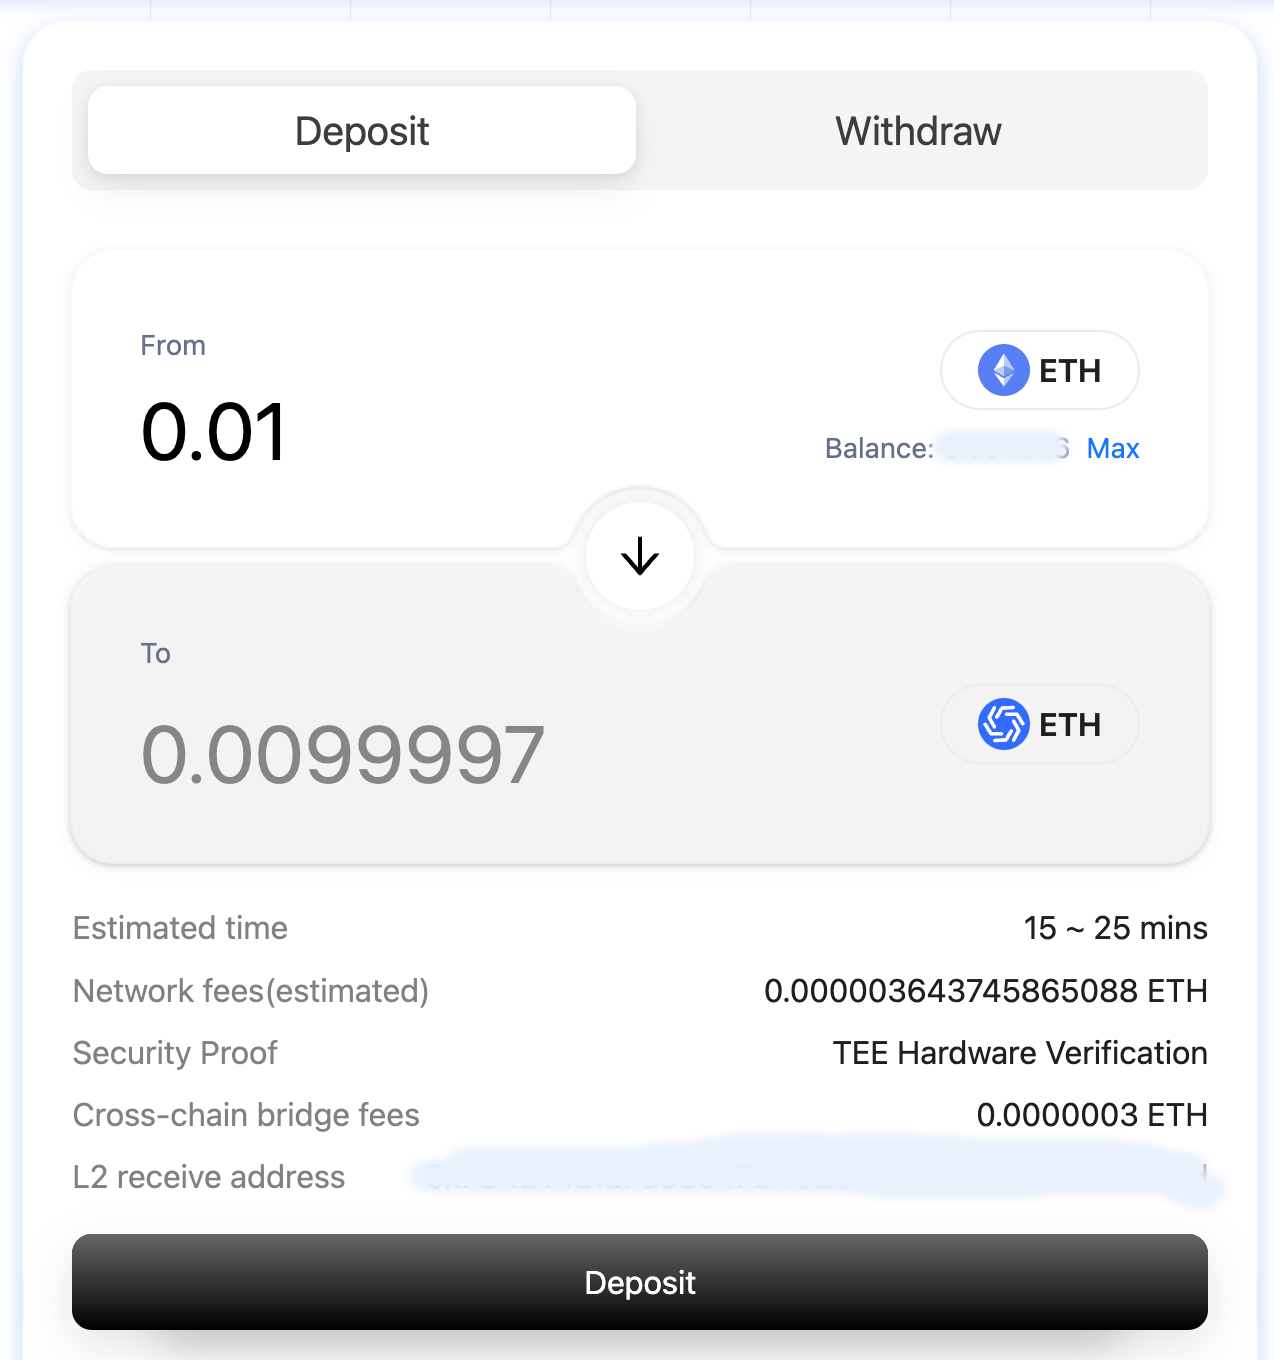
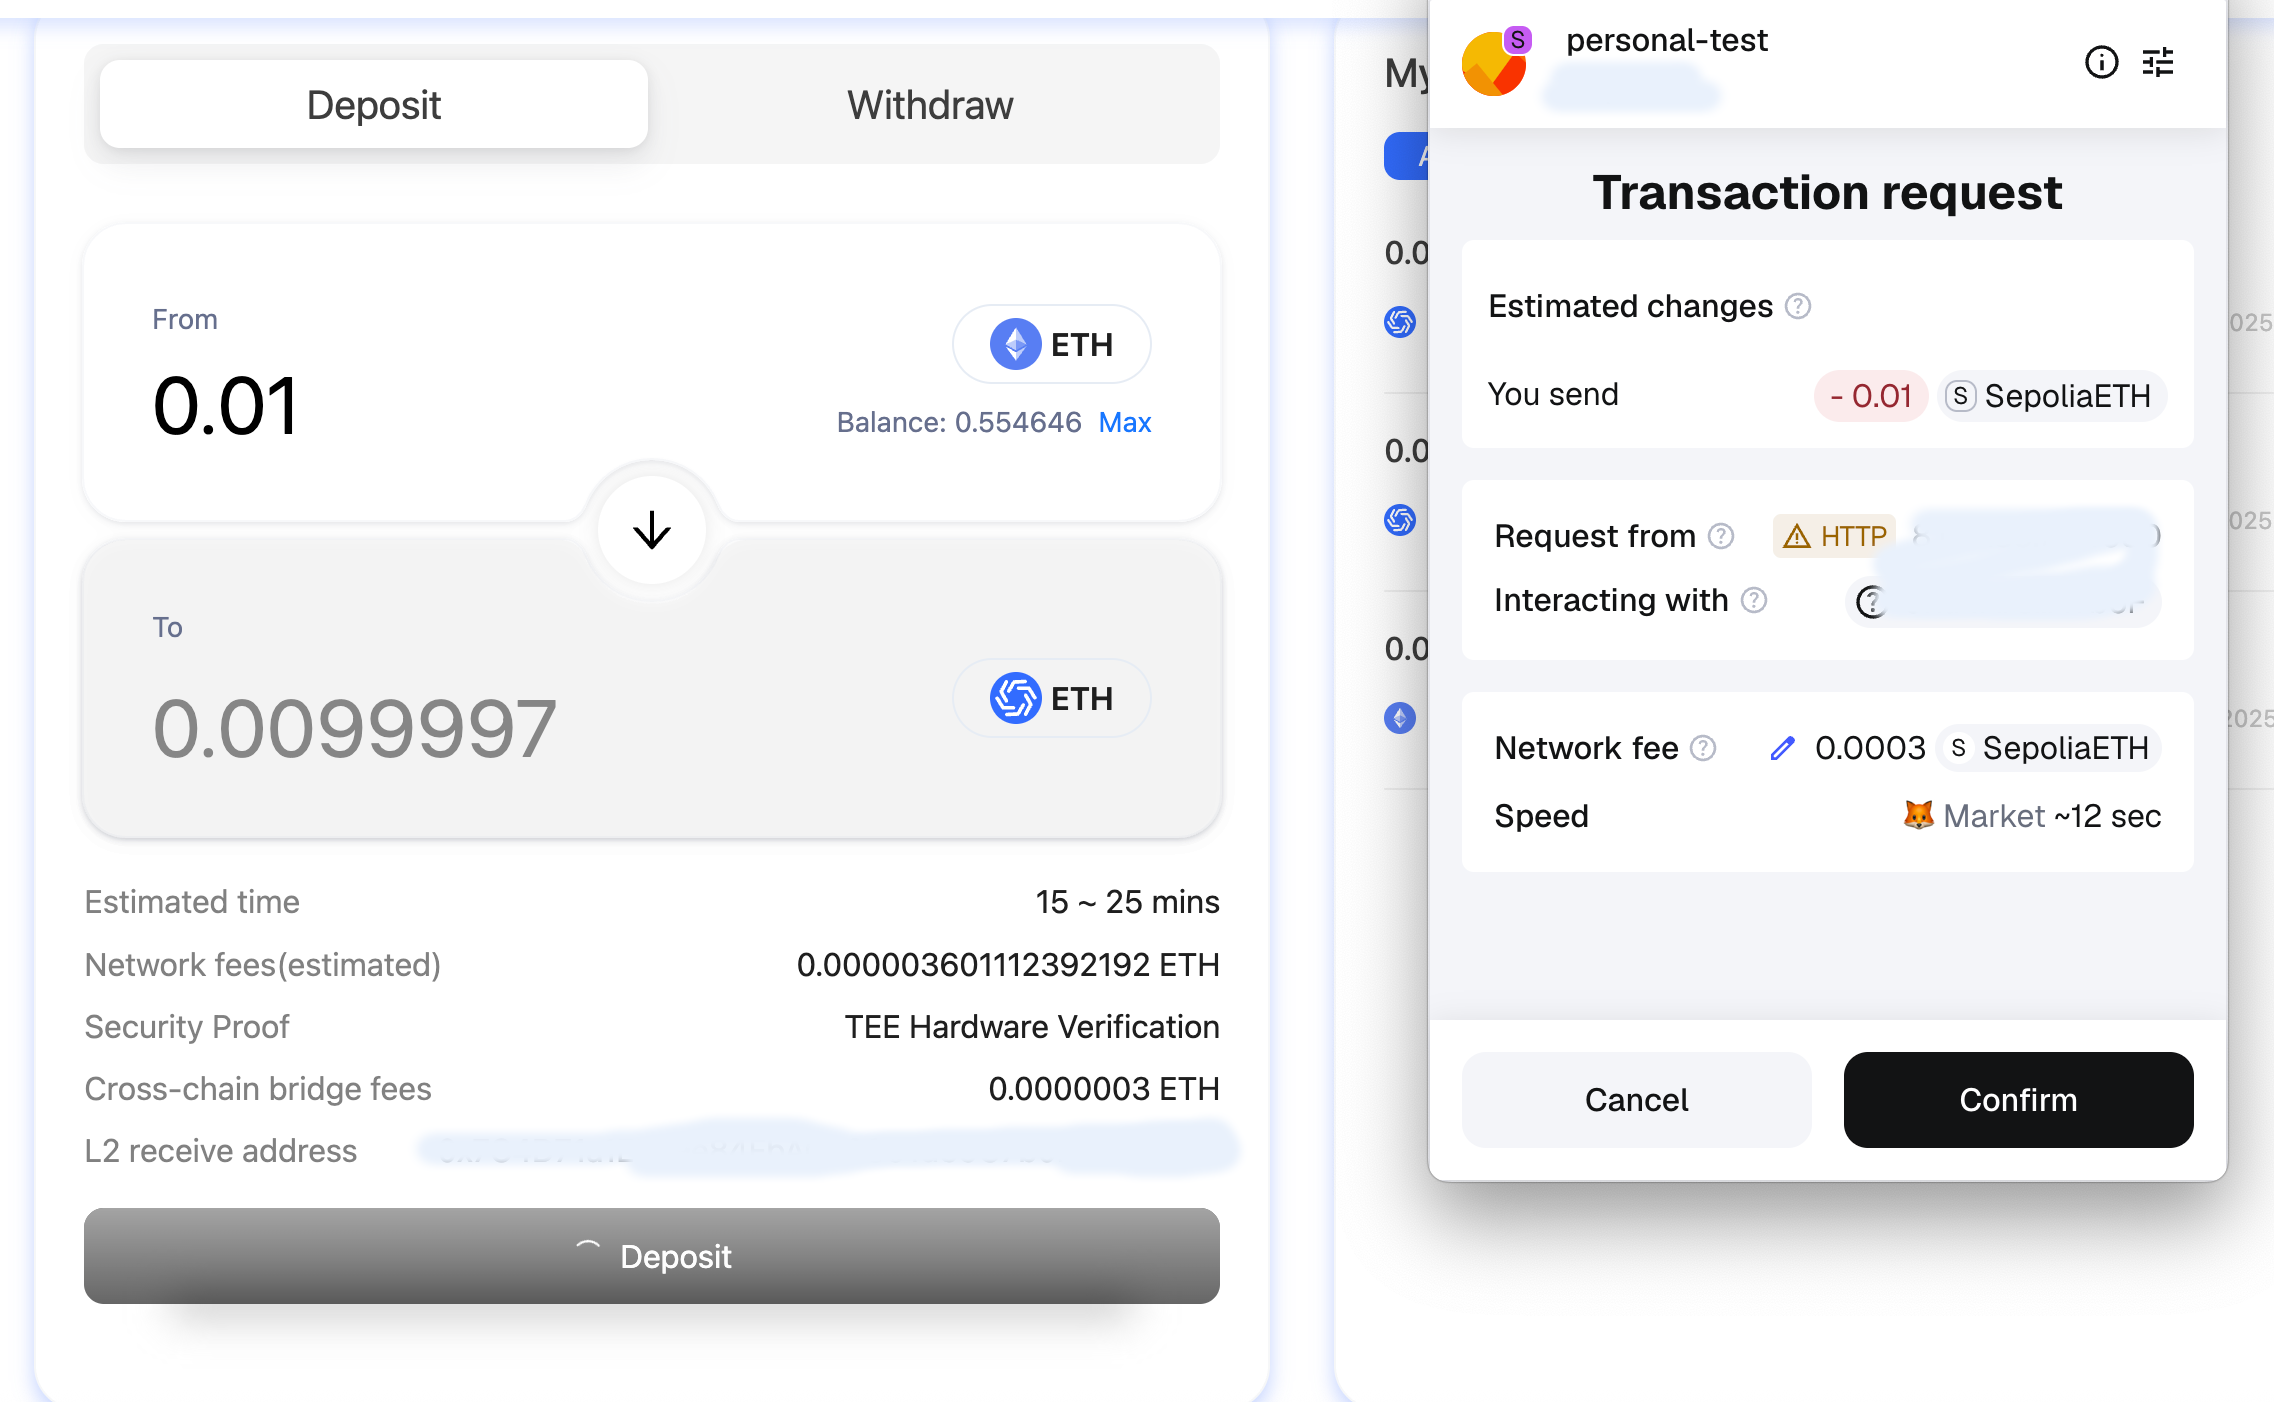
Start Deposit: Click the "Deposit" button.
Confirm Transaction: Your wallet will pop up asking you to confirm the transaction. Review the details and confirm.
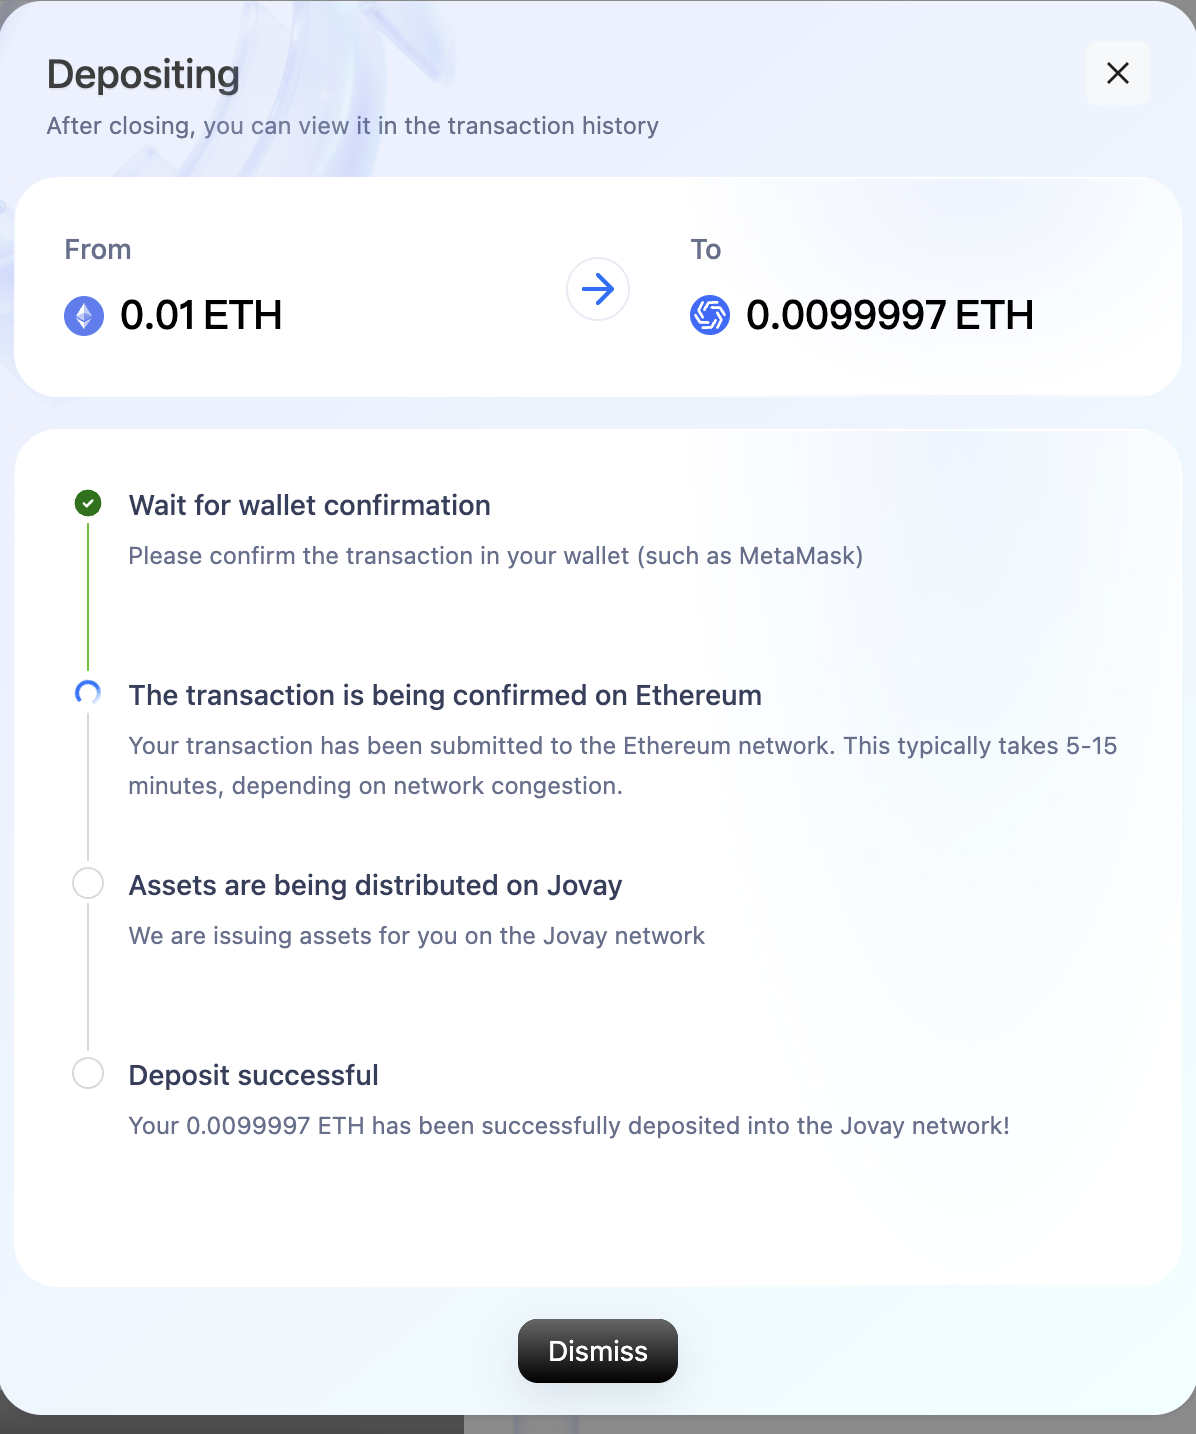
Monitor Progress: After confirming, the transaction will appear in the history panel on the right. You can click on this transaction to view its status.
The deposit process involves two main stages:
- The transaction is first finalized on Ethereum (L1).
- The Jovay Relayer detects the finalized L1 transaction and processes the corresponding deposit on Jovay (L2).
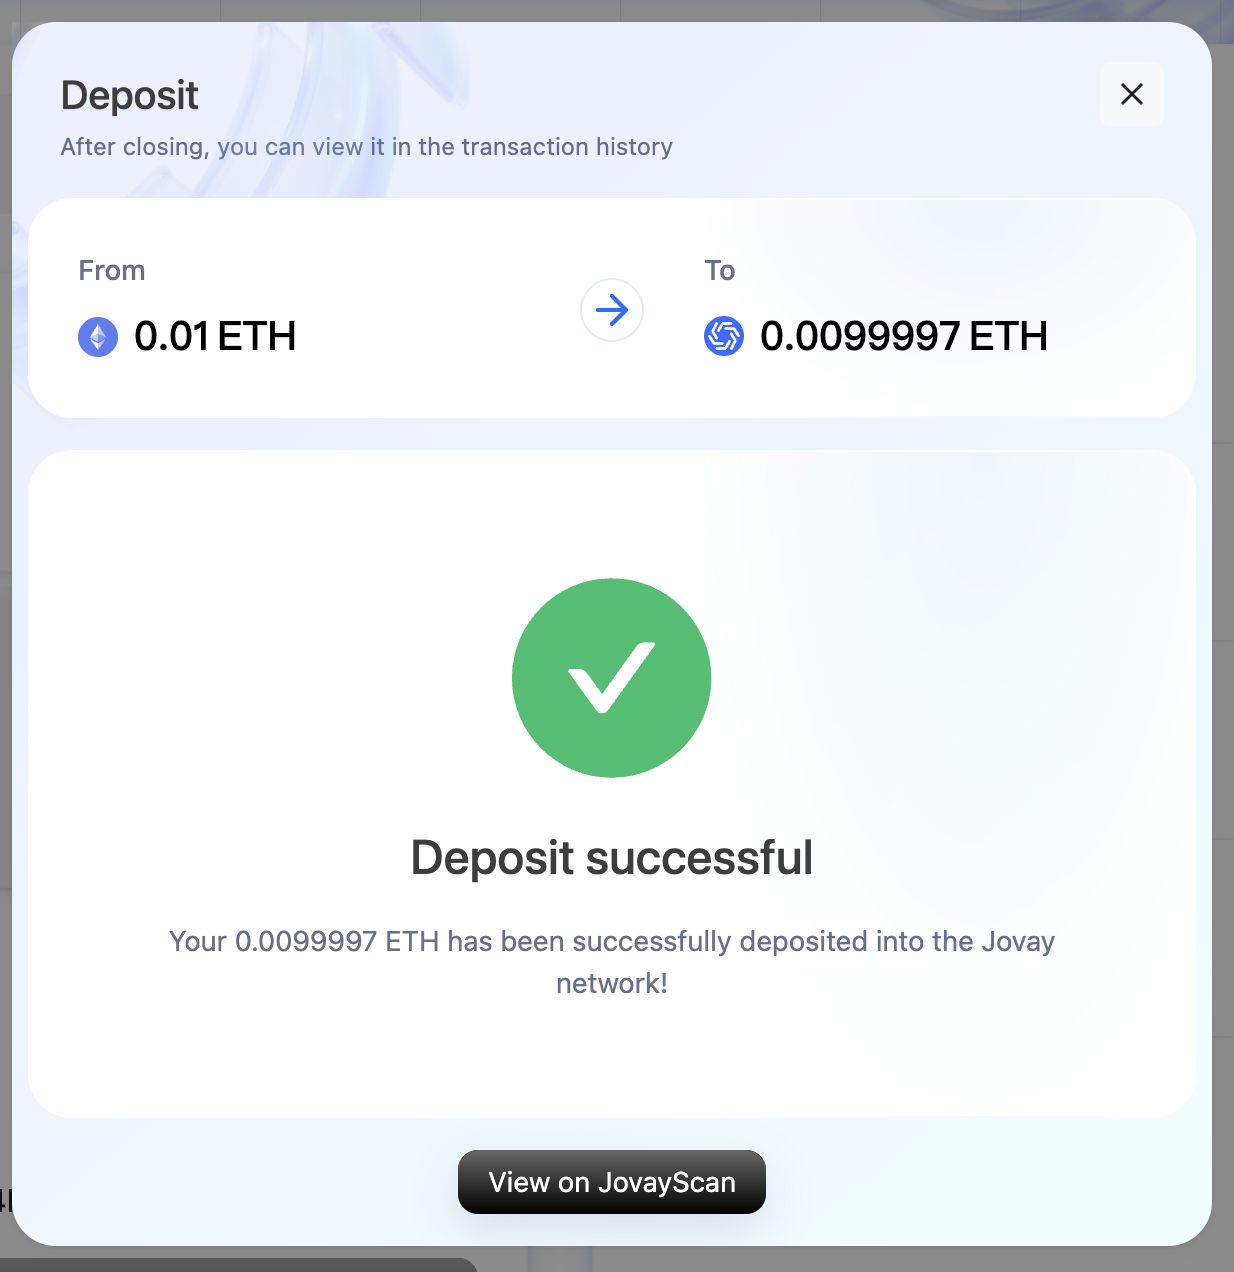
Deposit Complete: Once the process is finished, the status will update to "Completed". You can then click the "View on JovayScan" link to see your transaction details on the Jovay block explorer.
3. How to Withdraw (from Jovay to Ethereum)
The withdrawal process transfers ETH from the Jovay network (L2) back to the Ethereum network (L1). This is a multi-step process.
Switch to Jovay: Make sure the DApp is switched to the Jovay network in the top-right corner; if it isn't, you can click “Switch to the Jovay network”
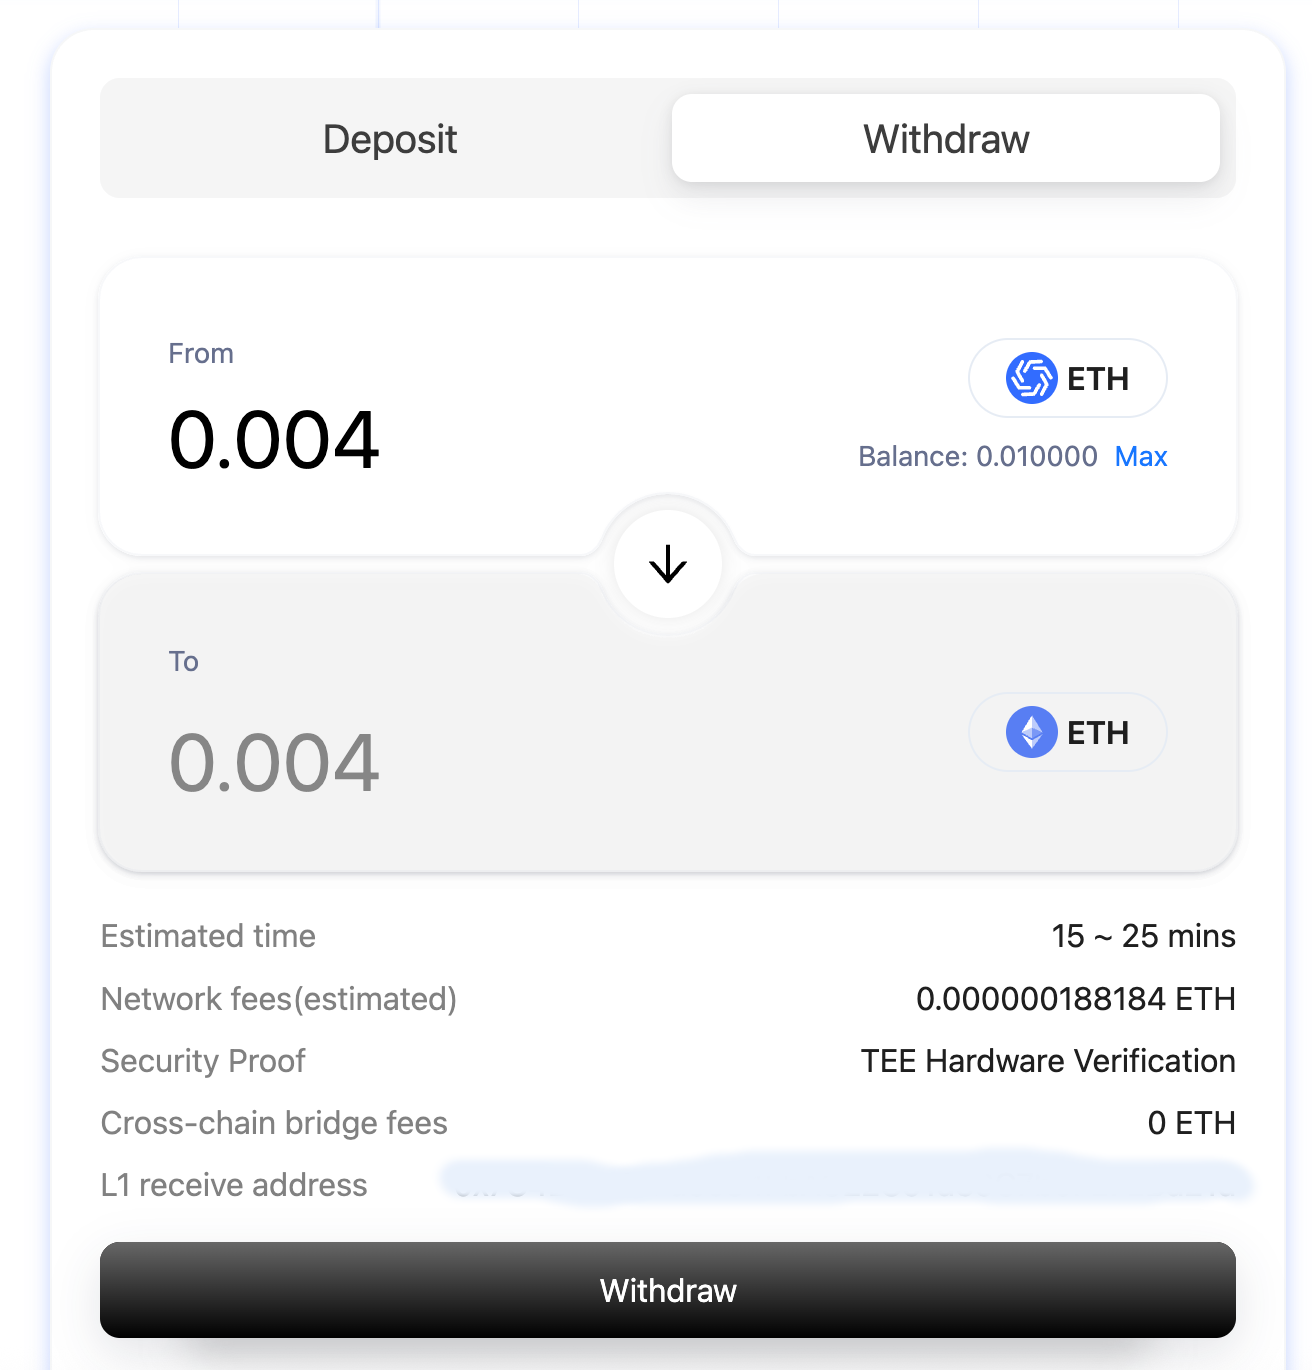
Select Withdraw: Navigate to the "Withdraw" tab.
Enter Amount: Input the amount of ETH you wish to withdraw to Ethereum.
Start Withdrawal: Click the "Withdraw" button and confirm the transaction in your wallet.
Track Withdrawal Status: Click on the transaction in the history panel to track its progress through several stages:
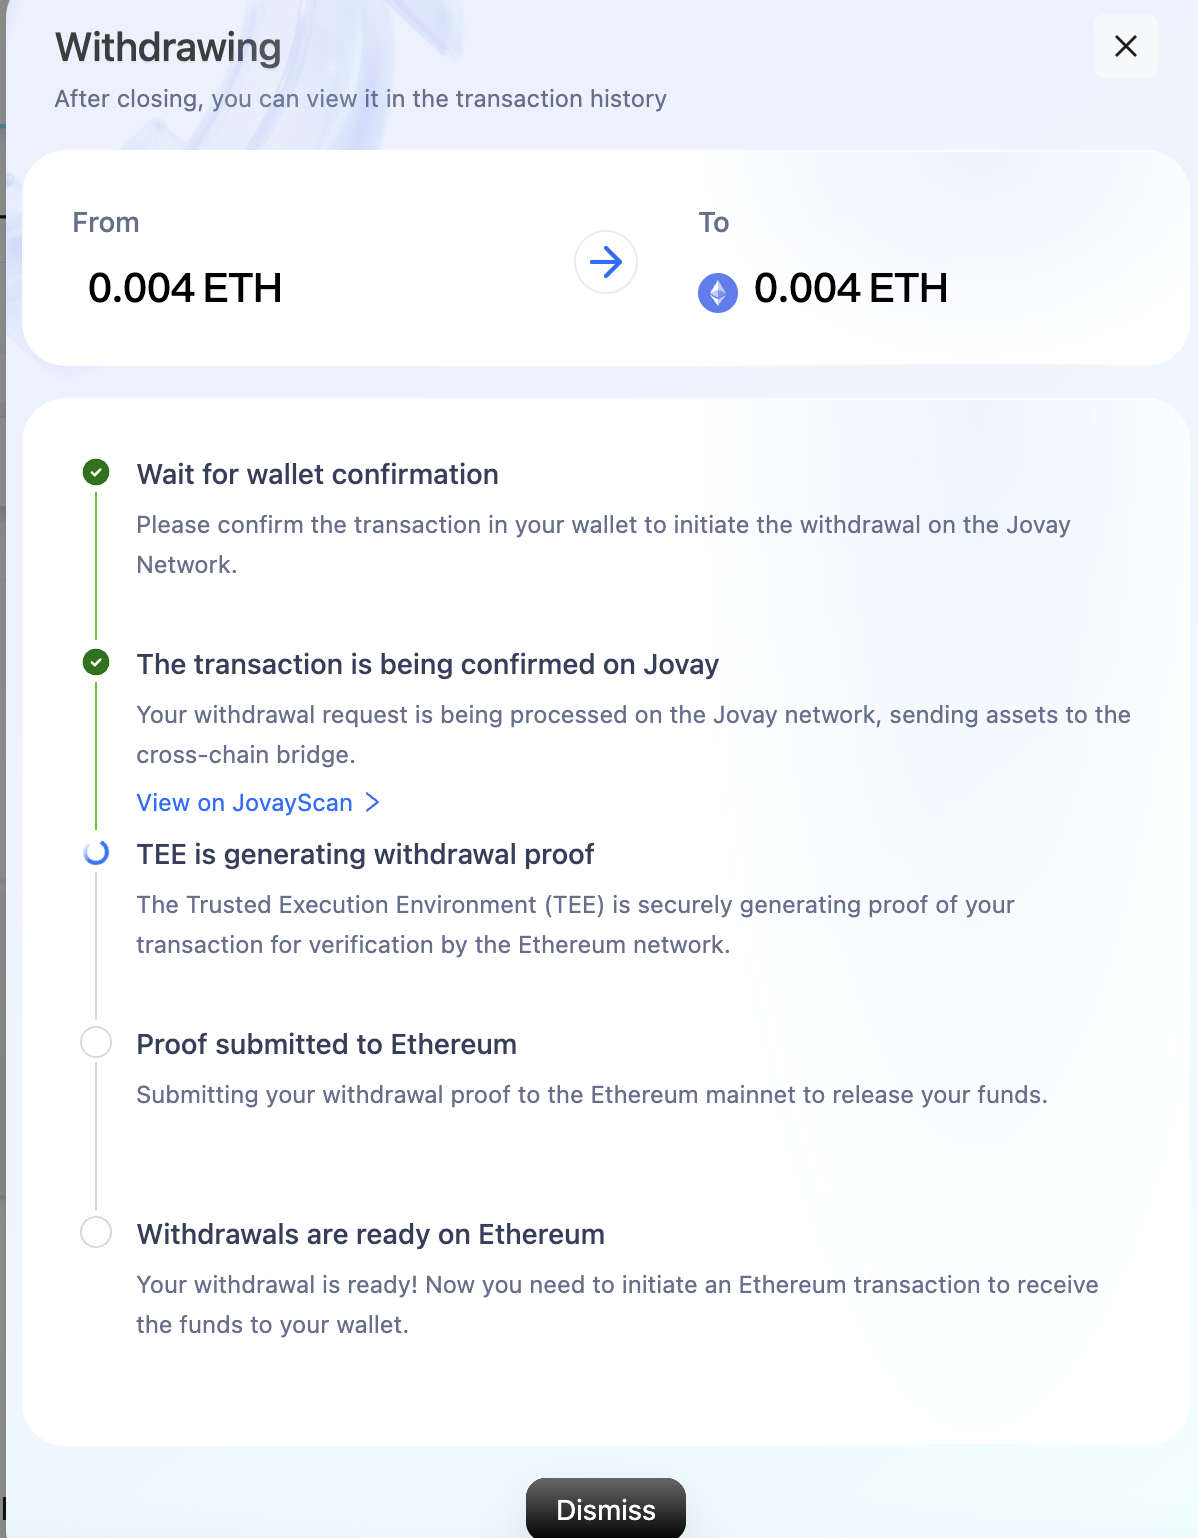
- Wait for wallet confirmation: The initial state after you submit the transaction.
- The transaction is being confirmed on Jovay: Your withdrawal is being processed and included in a block on the Jovay network.
- TEE is generating withdrawal proof: The Trusted Execution Environment (TEE) is creating the necessary proof for your withdrawal.
- Proof submitted to Ethereum: The withdrawal proof has been posted to the Ethereum network.
- Withdrawals are ready on Ethereum: The funds are now ready to be claimed on Ethereum.
Claim Your Funds: This is a crucial manual step. Once the status reaches "Withdrawals are ready on Ethereum", you must click the "Claim Funds" button. This will initiate a new transaction on the Ethereum network to transfer the funds to your wallet.
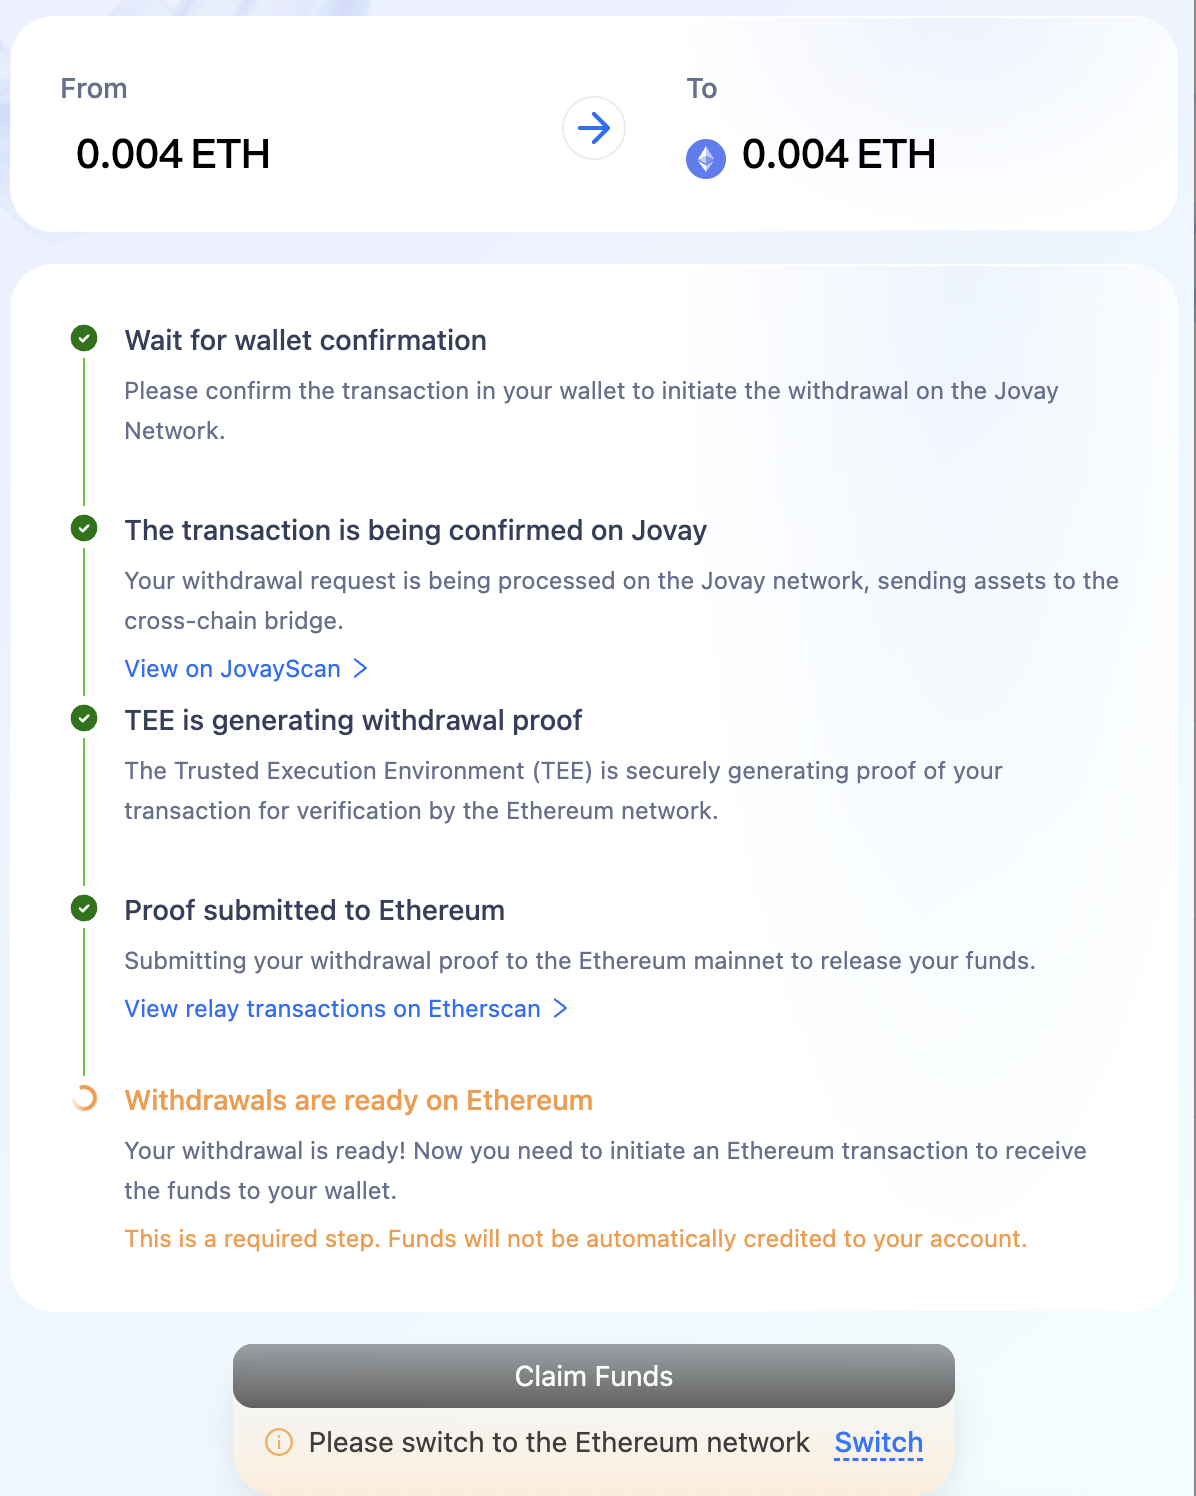
Note: Be aware that the withdrawal is initiated on Jovay, but after the proof is submitted to the ETH network, you need to switch the network to the ETH network in order to "Claim Funds" on Ethereum.
When you click "Claim Funds", MetaMask will open a popup. After verifying that the information is correct, click
Confirmto receive the funds.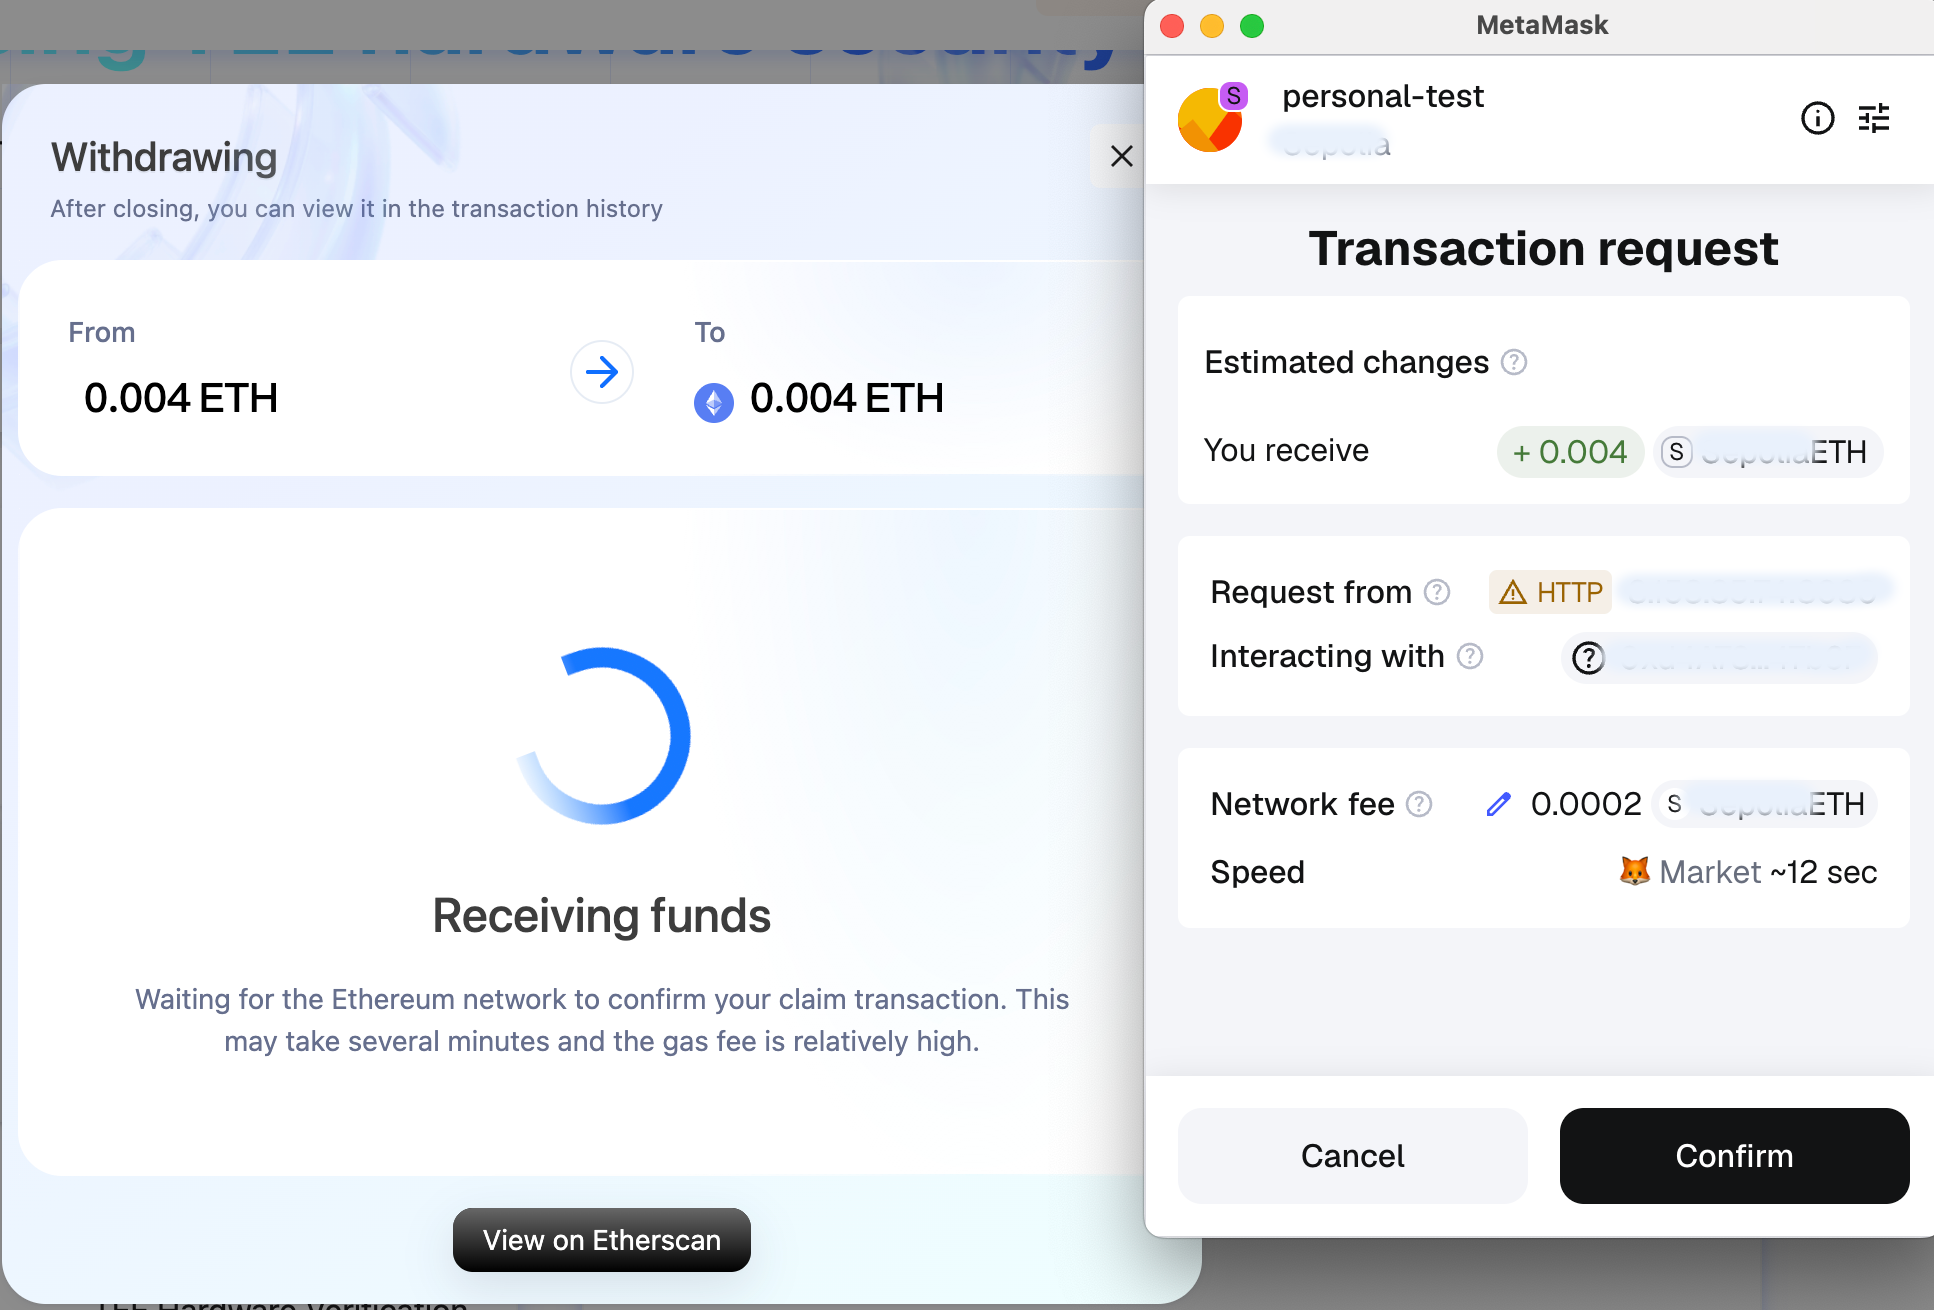
Withdrawal Complete: After you confirm the "Claim Funds" transaction in your wallet and it is confirmed on the Ethereum blockchain, the withdrawal is complete. You can view the final transaction on an Ethereum block explorer (like Etherscan) and see the updated ETH balance in your wallet.
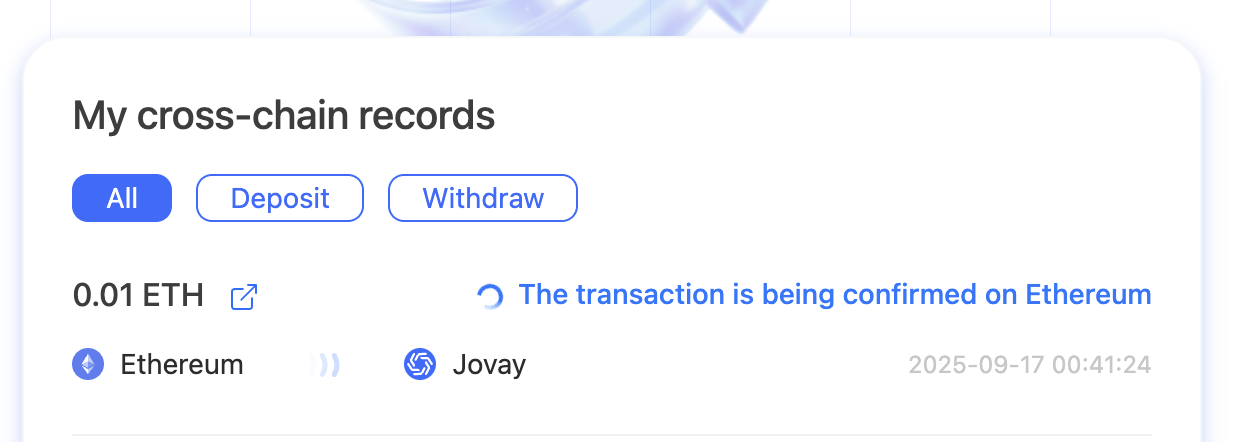
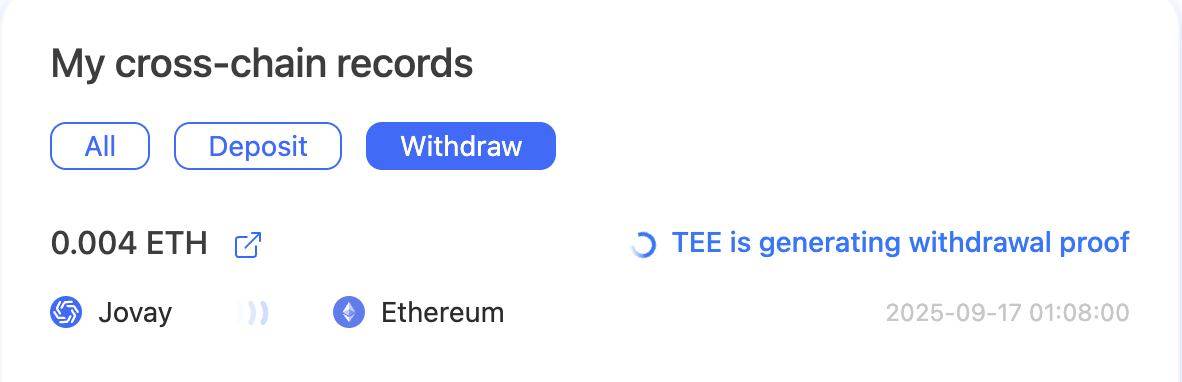
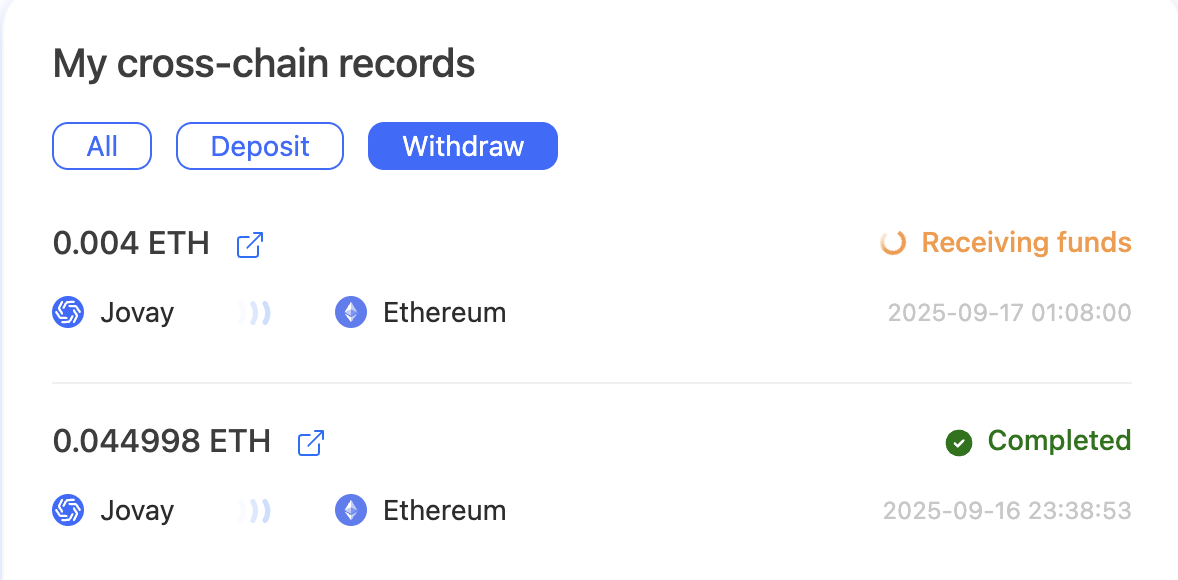
4. Transaction History
The panel on the right side of the page displays your recent transaction history.
- You can filter the list by clicking on "All", "Deposit", or "Withdraw".
- If your latest transaction doesn't appear, you can try switching between these tabs or refreshing the page to update the list.
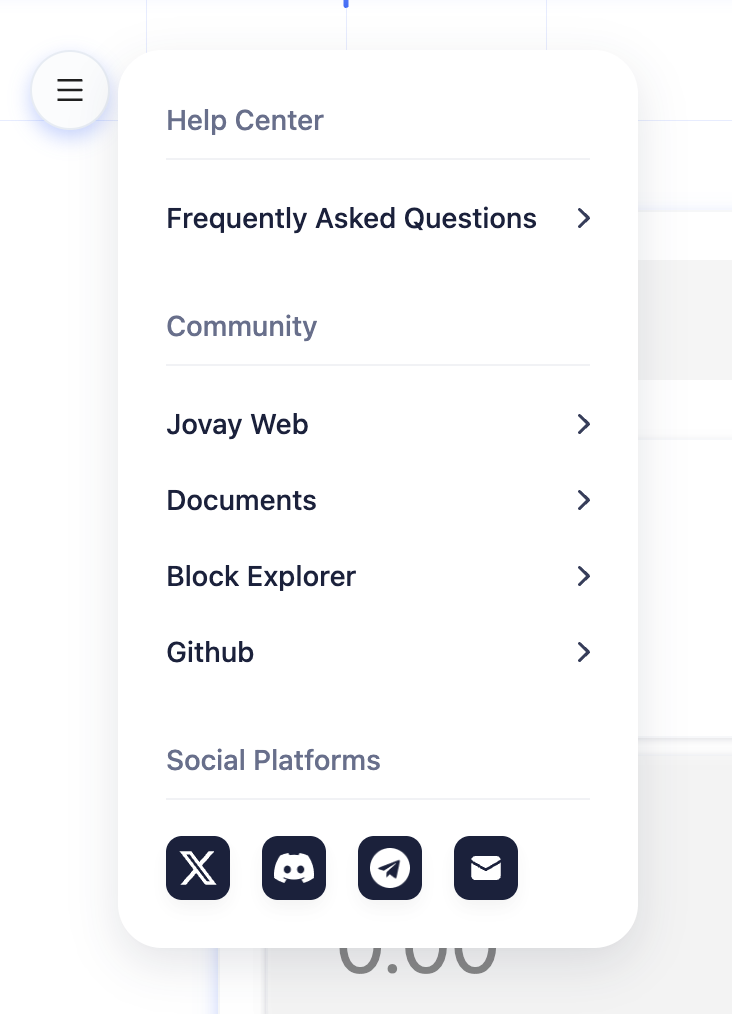
5. More info
In the top-left corner of the Jovay Bridge DApp, you can click the menu to view more information, such as the FAQ, Jovay’s official website, and Jovay’s social media links.
Please be advised:
To ensure the security of funds, the Jovay bridge operates with protective limits.
The current network-wide daily withdrawal limit is 20 ETH. This limit is shared by all users and resets periodically.